Nick Bartlett (joined at Paddington, left at Waterloo),
Matthew Cole & LASERman (both on the tour throughout)
Tour Review
(by Matthew Cole)
31st March 2007
Pathfinder Tours
The Buffer Puffer 4.1
| Locos Used | 37401 & 37410 |
| Stock Used | 4902+5040+4927+5009+3124+17015 |
Route:
1Z37 : London Paddington to Ardingly
1Z38 : Ardingly to London Blackfriars
1Z39 : London Blackfriars to London Cannon Street
1Z40 : London Cannon Street to Hayes
1Z41 : Hayes to London Bridge
1Z42 : London Bridge to London Waterloo
1Z43 : London Waterloo to London St Pancras
| Loco(s) | Route |
| 37410 (1) | London Paddington - Ladbroke Grove - (via Old Oak Common flyover) - Old Oak Common West Jn - Park Royal - Greenford East Jn - Greenford South Jn - Drayton Green - West Ealing - Acton Main Line - Acton Wells Jn - Willesden South West Sidings - Mitre Bridge Jn - North Pole Jn - Kensington Olympia - Latchmere Jn - Clapham Junction - Balham - Streatham Common - Selhurst - Windmill Bridge Jn - East Croydon - Stoats Nest Jn - (3) - Gatwick Airport - Three Bridges - Haywards Heath |
| 37401 (2) | Haywards Heath - Ardingly (end of line via No.1 Loop) |
| 37410 (1) | Ardingly - Haywards Heath |
| 37401 (2) | Haywards Heath - Three Bridges - Tinsley Green Up Loop - Gatwick Airport - Redhill - East Croydon - Norwood Junction - Crystal Palace - West Norwood - Tulse Hill - Herne Hill - Brixton - London Victoria |
| 37410 (1) | London Victoria - Stewarts Lane Jn - Longhedge Jn - Pouparts Jn - Clapham Junction - Balham - Streatham Hill - Leigham Jn - Tulse Hill - Herne Hill - Loughborough Junction - London Blackfriars |
| 37401 (2) | London Blackfriars - Loughborough Jn - Cambria Jn - Denmark Hill - Nunhead - Catford - Shortlands Diveunder - Shortlands - Bromley South - Bickley Jn - Petts Wood Jn - Orpington |
| 37410 (1) | Orpington - Petts Wood Jn - Chislehurst - Grove Park - Lee Spur Jn - Lee Loop Jn - Sidcup - Crayford Spur 'B' Jn - Crayford Spur 'A' Jn - Crayford Creek Jn - Slade Green - Plumstead - Charlton - Greenwich - London Bridge - London Cannon Street |
| 37401 (2) | London Cannon Street - London Bridge - New Cross - Lewisham Vale Jn - Lewisham - Ladywell - New Beckenham - Elmers End - Hayes |
| 37410 (1) | Hayes - (reverse of outward route) - Ladywell - Parks Bridge Jn - New Cross - London Bridge |
| 37401 (2) | London Bridge - South Bermondsey - Peckham Rye - Tulse Hill - Streatham - Streatham South Jn - Tooting - Wimbledon - St Helier - Sutton - Mitcham Junction - Streatham South Jn - Streatham - Tulse Hill - Herne Hill - Brixton - Linford Street Jn - Nine Elms Jn - London Waterloo |
| 37410 (1) | London Waterloo - Nine Elms Jn - Queenstown Road - Clapham Junction - Barnes - Chiswick - New Kew Jn - Kew East Jn - South Acton - Acton Wells Jn - Dudding Hill Jn - Cricklewood Curve Jn - West Hampstead North Jn - Carlton Road Jn - Kentish Town - Dock Jn North - Dock Jn South - Camley Street Jn - London St Pancras |
Notes :
(1) 37401 on rear.
(2) 37410 on rear.
(3) Booked via Redhill but routed via Quarry Line (rumoured to be "to give the
passengers a different view as booked back via Redhill").
Source : Alan Sheppard (joined at Paddington, left at
Clapham Junction),
Nick Bartlett (joined at Paddington, left at Waterloo),
Matthew Cole & LASERman (both on the tour throughout)
![]()
Tour Review
(by Matthew Cole)
With a prompt departure from London Paddington with only 30 seconds late departing, The Buffer-Puffer 4.1 looked as if was about to put Buffer Puffer 4.0 to shame. For those who travelled on The Buffer-Puffer 4.0 Tour or know anything about it, will know what I mean but hey!!! that’s another story. The tour left London Paddington and as booked, we took the Old Oak Common Flyover and headed towards Greenford South Junction before being routed back onto the Great Western Mainline. By the time we arrived at Acton Wells Junction, we were running 16 minutes early, which meant a Signal Stop at Signal WM622 (Located just north of Mitre Bridge Junction) to allow a Southern Class 377 (Unit 377205) - Watford Junction Service to pass. Shortly after the Watford Junction Service passed a Freight Train heading south was spotted being hauled by a Class 92. Soon afterwards, we continued on to Kensington Olympia for a Crew Change. We were at Kensington Olympia longer than our booked time; some people would say that isn’t good especially on a rail tour…
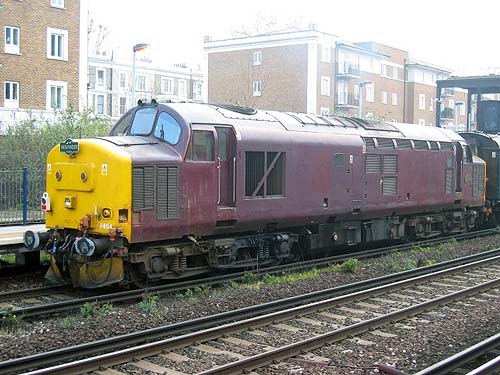
37401 & 37410 at Kensington Olympia (photos: Alan Sheppard)
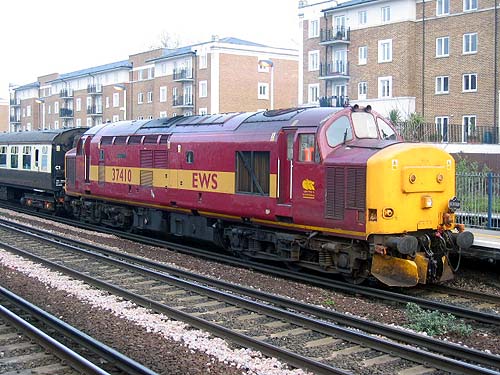
Well the bad news is… we left K.O. 13½ Minutes Late and with a pick up at Clapham Junction, was there any hope of making up lost time? From Clapham Junction we were routed via the Down Brighton Slow line to East Croydon, crossing over to platform 3 at East Croydon, then running via The Quarry Line and fast lines to Gatwick Airport and Three Bridges, instead of via Redhill, where we made up a fair amount of time knocking 17 minutes of the time.
Arriving at Haywards Heath, we were routed into the booked Platform, (Platform 1) arriving at 11:01½ for reversal to Ardingly. Departing at 11:09, we headed for Ardingly for a few photo takes. All was looking good so far and with an arrival time of 11:24 at Ardingly (as opposed to 11:39) we had a slightly longer break on the branch than what we had booked. We began heading back for Haywards Heath at 11:42 (11:53 Booked Time) and was held at Signal T331 for about ten minutes before being cleared into Platform 1 again for a reversal.
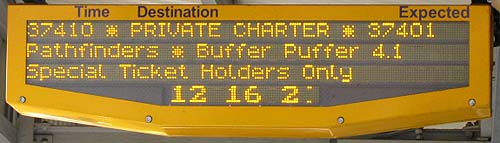
Haywards Heath train indicator (photo: LASERman)
On route to London Victoria, the tour was routed via the Slow Lines from Balcombe Tunnel Junction to Three Bridges then routed via the booked route of Redhill to East Croydon. From here we ran past Windmill Bridge Junction, which we passed just over 2½ hours earlier. We passed Selhurst Depot (which is in Possession all weekend due to engineering work), we were routed into platforms 1 and 2 at Norwood Junction, then routed along the Up Crystal Palace Spur to Crystal Palace then via Tulse Hill and Herne Hill to London Victoria arriving at Platform 2 almost on time at 13:42 (13:41 Booked Time) for our scheduled break.
At 14:25, I boarded the train after almost 45 minutes break, ready for a prompt departure at 14:30. Time now is 14:31 and we haven’t yet started moving, the platform staff having given the train a TRTS (Train Ready To Start). At 14:34, there’s news that 37410 had failed to start. I had my fingers crossed and hoped that 37410 hadn’t completely failed. At 14:35, 37410 came to life… Thank God… Because if it didn’t, the rest of the tour we had booked may have been cancelled… and we wasn’t half way through the tour yet. Anyway we left London Victoria at 14:37 and ran 7 minutes late but made up 3½ minutes by the time we got to Clapham Junction. From Pouparts Junction, we were routed via the Down Brighton Fast to Balham before crossing over the Brighton Slow Lines to be routed to the Leigham Curve via Streatham Hill. Now a minute early, the train ran down the lightly graded Leigham Curve to Tulse Hill - a route I haven’t done for about 4 years. We passed Tulse Hill for the second time taking the same route to Herne Hill as we did just over an hour earlier on route to London Victoria, this time taking a right turn and heading for London Blackfriars.
Buffer Puffer 4.1 arrived at London Blackfriars 30 seconds early and a few more photos to get in before taking off again for Orpington via the Catford Loop.
37410 at the stops of Blackfriars station (photo: Matthew Cole)
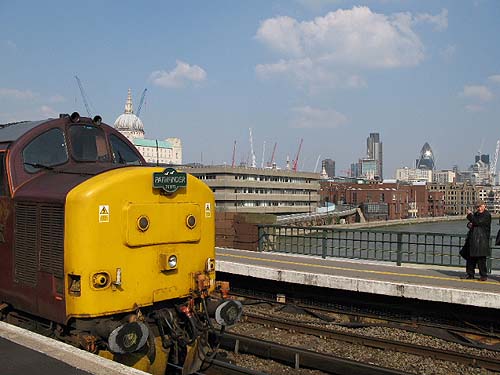
37401 and the London skyline (photo: LASERman)
We left London Blackfriars 2 minutes late but this didn’t prevent the train getting into Orpington more or less on time… at 16:01½.
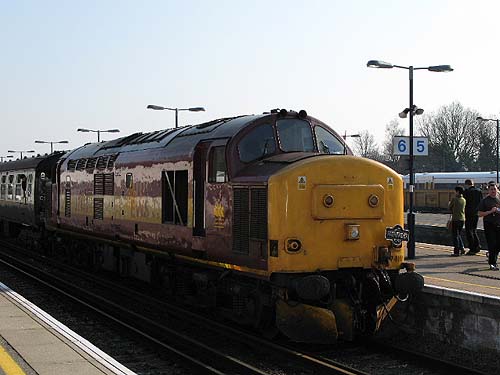
On time at Orpington (photo: LASERman)
A right time departure from Orpington at 16:16, it wasn’t long before something else went wrong. Well not that anyone noticed it this time anyway… or so I’m assuming. Shortly after we passed through Grove Park…. Buffer-Puffer 4.1 reached Signal L306. Although Signal L306 showed a proceed aspect, the train came to a halt at L306 due to wrong route. It later turns out that the Signaller hadn’t read his / her paperwork correctly and thought we were running direct to London Cannon Street as opposed to taking the scenic route via Sidcup, Woolwich and Greenwich. The signal was reset and we were on our way along the booked route.
We passed through Sidcup and Crayford and arrived at the Crayford Curve almost twenty minutes early. We sat here for a few minutes to await a Semi-Fast Charing Cross Service and a Stopping Service (both via Greenwich) to pass. We passed Slade Green Depot with a Class 375 sleeping away until it’s needed for what I’m assuming makes the 05:10 Dartford to Dover Priory (Monday Morning). Moving on, we followed the Dartford to London Cannon Street service for the main part of the route. Shortly after we past Abbey Wood, two local chavs/graffiti artists carrying spray paint cans thought it was a brilliant idea to run across the tracks as the BP4.1 was approaching the site they decided to cross, nearly get hit in the process. Wait a minute!!! I had a camera phone with me. The driver stopped the train at Signal NK108 and reported the incident to the Signaller before carrying on which the trip.
We arrived at London Cannon Street at 17:39, 13 minutes ahead of schedule and with the extra time for a few more photos. I and another Railtour passenger had a little chat and a chuckle with the driver about the trip up from Orpington. The wrong route, the trespassers on the line… I could have been nasty and say ‘Ah… Shame we couldn’t have run them over, they shouldn’t have been on the line in the first place’, but I think I’ll keep quiet on that one.
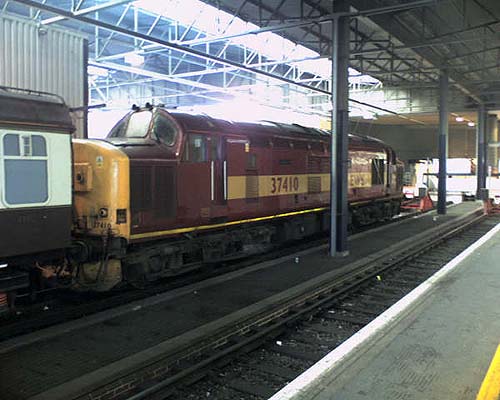
Our next destination is Hayes (Kent), we departed on time and routed through platform 1 at London Bridge and instead of crossing over to Line No. 4 (Down Fast) to the Tanners Hill Flyover into Lewisham like BP4.0, we were routed via Line Number 1 (Down Slow) to St Johns and crossed over to Platform 2 at Lewisham. Further down the Mid-Kent Line to Hayes, we reach Elmers End, the station which provides interchange with the Croydon Tramlink. Until ten years ago, the Tramlink Platform used to be a bay platform for the shuttle service from Elmers End to Addiscombe. And before that, many years ago, there were through services from London to Sanderstead and beyond via this route. We reach Hayes (Kent) at 18:53… a few more photos then we depart at 19:04½ for London Bridge (Low Level). We reach Spa Road Junction… From here we are routed along the Up Passenger Line to Platform 10, by this time, it’s starting to get dark. We reach London Bridge at 19:37. Again, we have another chance to get some more photos in before we traverse the lines of South London one more time. I managed to get a few more in cutting fine the time before we depart for London Waterloo (Main).
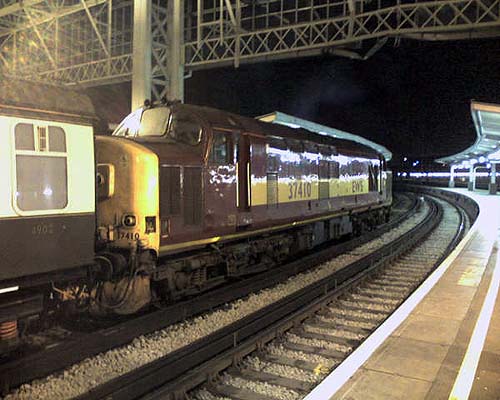
37410 waits to leave London Waterloo (photo: Matthew Cole)
We depart on time… this time taking a different route. We head via the South London Line to Peckham Rye, then taking a left turn and head towards Tulse Hill, third time we passed here today. We head out towards the Wimbledon Loop heading Anti-Clockwise via Wimbledon, Sutton and Mitcham Junction. From here we return to Tulse Hill one last time before heading to Herne Hill and Brixton before taking a right turn at Linford Street Junction to Nine Elms Junction and up the Windsor Reversible into Platform 14 at London Waterloo. With one more leg of the tour to cover, the day out had been a lot better on what Buffer Puffer 4.0 was. We left London Waterloo a couple of minutes late and lost a few minutes more on route to St. Pancras. Lucky enough we managed to make some up and at 22:17… The Buffer-Puffer 4.1 finally arrived at London St. Pancras three minutes behind schedule. This is certainly a day to remember.
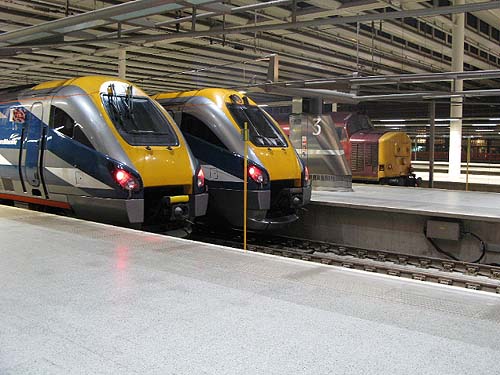
Nose ends at St Pancras (photo: LASERman)
Matthew Cole
![]()
Footnote (for Top Gear viewers):
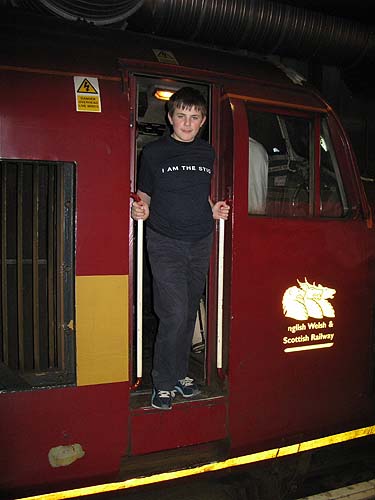
"I am the Stig" - so now you know...
Next series will see the launch of "star in a reasonably
knackered class 37" and Stig may well go for the lap
record too (that's for the slowest lap of course...)
(photo: :LASERman)
![]()
Timings (Booked & Actual)
(from Alan Sheppard, Matthew Cole & LASERman)
| M.C | Location | Booked | Actual |
| 0.00 | London Paddington | 08.35d | 08.36 [P5] [L1] |
| - | Old Oak Common East | 08/50 | 08/43½ [Flyover] |
| - | Old Oak Common Reception | 08/51 | 08/45 [Recp 1] |
| - | Old Oak Common West | 08/52 | 08/46½ |
| - | Park Royal Branch Jn | 08/54 | 08/49 |
| - | Greenford East Jn | 09/00 | 08/54½ |
| - | Greenford South Jn | 09/02 | 08/56 |
| - | Drayton Green | 09/11 | 09/00 |
| - | West Ealing | 09/19 | 09.01 ~ 09.03 |
| - | Acton West | 09/25 | 09/09 |
| - | Acton Main Line | 09/26 | 09/10 [P4] |
| - | Acton Wells Jn | 09/29 | 09/12½ |
| - | Willesden South West Sidings | 09/31 | 09/15½ [Dn SWS] |
| - | Mitre Bridge Jn | 09/34 | 09.17½ ~ 09.26 |
| - | North Pole Jn | 09/35 | 09/28 |
| - | Kensington Jn (Sig VC808) | ? | 09/30 |
| 16.51 | Kensington Olympia | 09*38 ~ 09*45 | 09.30 ~ 09.58½ [P3] |
| - | Latchmere Jn | 09/52 | 10/04 |
| 19.68 | Clapham Junction | 09.58a ~ 10.02d [P17] | 10.06½ ~ 10.09 [P17] [DBS] |
| - | Balham | 10/06½ | 10/13 [P1] |
| - | Streatham Common | 10/09 | 10/18½ [P1] |
| - | Selhurst | 10/14½ | 10/27½ [P1] |
| - | Windmill Bridge Jn | 10/23 | 10/31 [DVS] |
| - | East Croydon | 10/25 | 10/32½ [P3] [DBF] |
| - | South Croydon | 10/27 | 10/34 [P2] |
| - | Purley | 10/31 | 10/37 [P2] |
| - | Stoats Nest Jn | 10/35 | 10/38 [QL] |
| - | Redhill | 10/47 | DIV |
| - | Earlswood | 10/50 [P2] | 10/45 [DF] |
| - | Gatwick Airport | 10/59 | 10/49½ [P5] |
| - | Three Bridges | 11/04 | 10/52½ [P5] |
| - | Balcombe Tunnel Jn | 11/12 | 10/55 |
| 54.77* 0.00 |
Haywards Heath | 11.18a ~ 11.25d | 11.01½ ~ 11.09 [P1] |
| 2.37 0.00 |
Ardingly | 11.37 ~ 11.53 | 11.24 ~ 11.42 |
| 2.37 0.00 |
Haywards Heath | 12p10a ~ 12p20d | 12.08 ~ 12.22 [P1] |
| - | Copyhold Jn | 12/23 | 12/24½ |
| - | Balcombe Tunnel Jn | 12/31 | 12/32 [US] |
| - | Three Bridges | 12/36 | 12/36½ [P2] [US] |
| - | Gatwick Airport | 12/42 | 12/42½ [UL] [P2] |
| - | Earlswood | 12/49 | 12/49½ |
| - | Redhill | 12/55 | 12/52½ [Up Through] |
| - | Stoats Nest Jn | 13/03 | 13/02 [US] |
| - | Purley | 13/06 | 13/05½ [P3] |
| - | South Croydon | 13/09 | 13/09 |
| - | East Croydon | 13/11 | 13/11½ [P4] |
| - | Windmill Bridge Jn | 13/13 | 13/13 |
| - | Cottage Jn | ? | 13/13½ [ULBS] |
| - | Norwood Fork Jn | 13/14 | 13/14½ |
| - | Norwood Junction | 13/15½ | 13/17 [P1+2] |
| - | Bromley Jn | 13/17 | 13/19½ |
| - | Crystal Palace | 13/18½ | 13/21½ [P1] |
| - | West Norwood | 13/22 | 13/25½ |
| - | Tulse Hill | 13/28 | 13/31 [P3] |
| - | Herne Hill | 13/31 | 13/34½ [P1] |
| - | Brixton | 13/33 | 13/36 [P1] |
| - | Voltaire Road Jn | 13/35 | 13/37½ |
| 37.77 0.00 |
London Victoria | 13.41a ~ 14.30d | 13.42 ~ 14.37 [P2] |
| - | Grosvenor Bridge Jn | 14/33 | 14/39½ [Dn Stew Ln] |
| - | Stewarts Lane Jn | 14/36 | 14/41½ [REV] |
| - | Longhedge Jn | 14/41 | 14/43 |
| - | Pouparts Jn | 14/44 | 14/47½ [DBF] |
| - | Clapham Junction | 14/46 | 14/49 [P13] |
| - | Balham | 14/52 | 14/54½ [P3] [DBF-DCP] |
| - | Streatham Hill | 14/57 | 14/58½ [P2] |
| - | Leigham Jn | 15/01 | 15/00 |
| - | Tulse Hill | 15/04 | 15/01½ [P1] |
| - | Herne Hill | 15/07 | 15/04½ [P1] |
| - | Loughborough Jn | 15/09 | 15/08½ [UHF] |
| - | Elephant & Castle | ? | ? [P3] |
| 12.13 0.00 |
London Blackfriars | 15p17a ~ 15p29d | 15.16½ ~ 15.31 [P3] [DHF] |
| - | Elephant & Castle | ? | ? [P4] |
| - | Loughborough Junction | 15/37 | 15/37½ |
| - | Cambria Jn | 15/38 | 15/38½ |
| - | Denmark Hill | 15/39 | 15/39½ [P4] |
| - | Crofton Road Jn | 15/40 | 15/40 |
| - | Nunhead | 15/42 | 15/42 [P2] |
| - | Catford | ? | ? [P2] |
| - | Shortlands Jn | 15/50 | 15/49 [DCF] |
| - | Bromley South | 15/53 | 15/51 [P2] |
| - | Bickley Jn | 15/55½ | 15/56 [DST] |
| - | Petts Wood Jn | 15/58 | 15/57½ [DS] |
| 15.42 0.00 |
Orpington | 16p01a ~ 16p16d | 16.01½ ~ 16.16 [P6] |
| - | Petts Wood Jn | 16/19 | 16/20½ [US] |
| - | Chislehurst | 16/23 | 16/21½ [P3] |
| - | Grove Park | 16/30 | 16/25½ [P4] |
| - | Lee Spur Jn | 16/34 | 16/34½ [Dn Spur] |
| - | Lee | 16/41 | 16/36 |
| - | Sidcup | 16/50 | 16/41½ [P2] |
| - | Crayford | 17/05 | 16/47 |
| - | Crayford Spur 'B' Jn | 17/09 | 16/50 |
| - | Crayford Spur 'A' Jn | 17/10 | 16/58 |
| - | Crayford Creek Jn | 17/11 | 17/00 |
| - | Slade Green | 17/12 | 17/01 [P1] |
| - | Woolwich Arsenal | 17/24 | 17/18 |
| - | Charlton | 17/30 | 17/22½ |
| - | Greenwich | 17/36 | 17/27 [P2] |
| - | North Kent East Jn | 17/41 | 17/30½ [L3] |
| - | Spa Road Jn | 17/45 | 17/33½ [L3] |
| - | London Bridge | 17/48 | 17/36 [P2] |
| - | Borough Market Jn | 17/49 | 17/37 [C.St.RVL] |
| 30.77 0.00 |
London Cannon Street | 17.52a ~ 18.16d | 17.39½ ~ 18.16 [D] [P7] [C] |
| - | Borough Market Jn | 18/18 | 18.18 ~ 18.20 |
| - | London Bridge | 18/19 | 18/21½ [P1] |
| - | Spa Road Jn | 18/22 | 18/23½ [L1] |
| - | North Kent East Jn | 18/24 | 18/26 [L1] |
| - | New Cross | 18/25 | 18/27 [DS] |
| - | Tanners Hill Jn | 18/27 | DIV |
| - | St Johns | DIV | ? [P2] |
| - | Lewisham | 18/30 | 18.29½ ~ 18.30½ [P2] |
| - | Ladywell | 18/33 | 18/33½ |
| - | New Beckenham | 18/42 | 18/39 |
| - | Elmers End | 18/47 | 18/44 |
| 13.18 0.00 |
Hayes | 18p55a ~ 19p04d | 18.54 ~ 19.04½ [P1] |
| - | Elmers End | 19/13 | 19/11½ |
| - | New Beckenham | 19/17 | 19/14 |
| - | Parks Bridge Jn | 19/23 | 19/22½ [UF] |
| - | New Cross | 19/25 | 19/24½ |
| - | North Kent East Jn | 19/26 | 19/25 [L6] |
| - | Spa Road Jn | 19/31 | 19/34½ |
| 12.42 0.00 |
London Bridge | 19.36a ~ 19.46d | 19.37 ~ 19.46 [P10] [DSL] |
| - | South Bermondsey | 19/50 | 19/50 |
| - | Peckham Rye | 19/54 | 19/53 [P1] |
| - | Tulse Hill | 19/59 | 19/58 [P4] |
| - | Streatham | 20/02 | 20/00 [P1] |
| - | Streatham South Jn | 20/03 | 20/01½ |
| - | Wimbledon | 20/11 | 20/06 [P9] |
| - | St Helier | 20/16 | 20/12 |
| - | West Sutton | 20/20 | 20/15 |
| - | Sutton | 20/23½ | 20/18 [P1] |
| - | Mitcham Junction | 20/29½ | 20/23½ [P1] |
| - | Streatham South Jn | 20/34 | 20/27 |
| - | Streatham | 20/36 | 20/28 [P2] |
| - | Tulse Hill | 20/43 | 20/32 [P1] |
| - | Herne Hill | 20/48 | 20/34½ [P1] |
| - | Brixton | 20/49 | 20/36 |
| - | Shepherds Lane Jn | 20/50 | 20/42½ |
| - | Voltaire Road Jn | 20/53 | ? |
| - | Linford Street Jn | 20/56 | 20/38½ |
| - | Nine Elms Jn | 20/57 | 20/39½ [WRV] |
| - | Vauxhall | ? | ? [P1] |
| 30.35 0.00 |
London Waterloo | 21.01a ~ 21.15d | 20.49½ ~ 21.17 [P14] |
| - | Nine Elms Jn | 21/19 | 21/22 |
| - | Queenstown Road (Battersea) | 21/20 | 21/24 [UWL - DWSL] |
| - | Clapham Junction | 21/22 | 21.28 ~ 21.29½ [P5] |
| - | Barnes | 21/30 | 21/36 [P3] |
| - | New Kew Jn | 21/38 | 21/43 |
| - | Kew East Jn | 21/40 | 21/44 |
| - | South Acton | 21/42 | 21/50½ |
| - | Acton Wells Jn | 21/47 | 21/56 |
| - | Acton Canal Wharf Jn | 21/49 | 21/57 |
| - | Dudding Hill Jn | 21/55 | 22/03½ |
| - | Cricklewood Curve Jn | 21/58 | 22/07 [UHL] |
| - | West Hampstead North Jn | 22/00 | 22/10 [UFL] |
| - | West Hampstead Thameslink | 22/01 | 22/10½ |
| - | Carlton Road Jn | 22/06 | 22/12½ |
| - | Kentish Town | 22/07 | 22/13 [UF] |
| - | Dock Junction North | 22/08 | 22/14 |
| - | Dock Junction South | 22/09 | ? |
| - | Camley Street Jn | 22/11 | ? |
| 21.39 | London St Pancras | 22.13a | 22.17 [P4] |
![]()
![]() Back to "The Railtour Files"
Back to "The Railtour Files"